
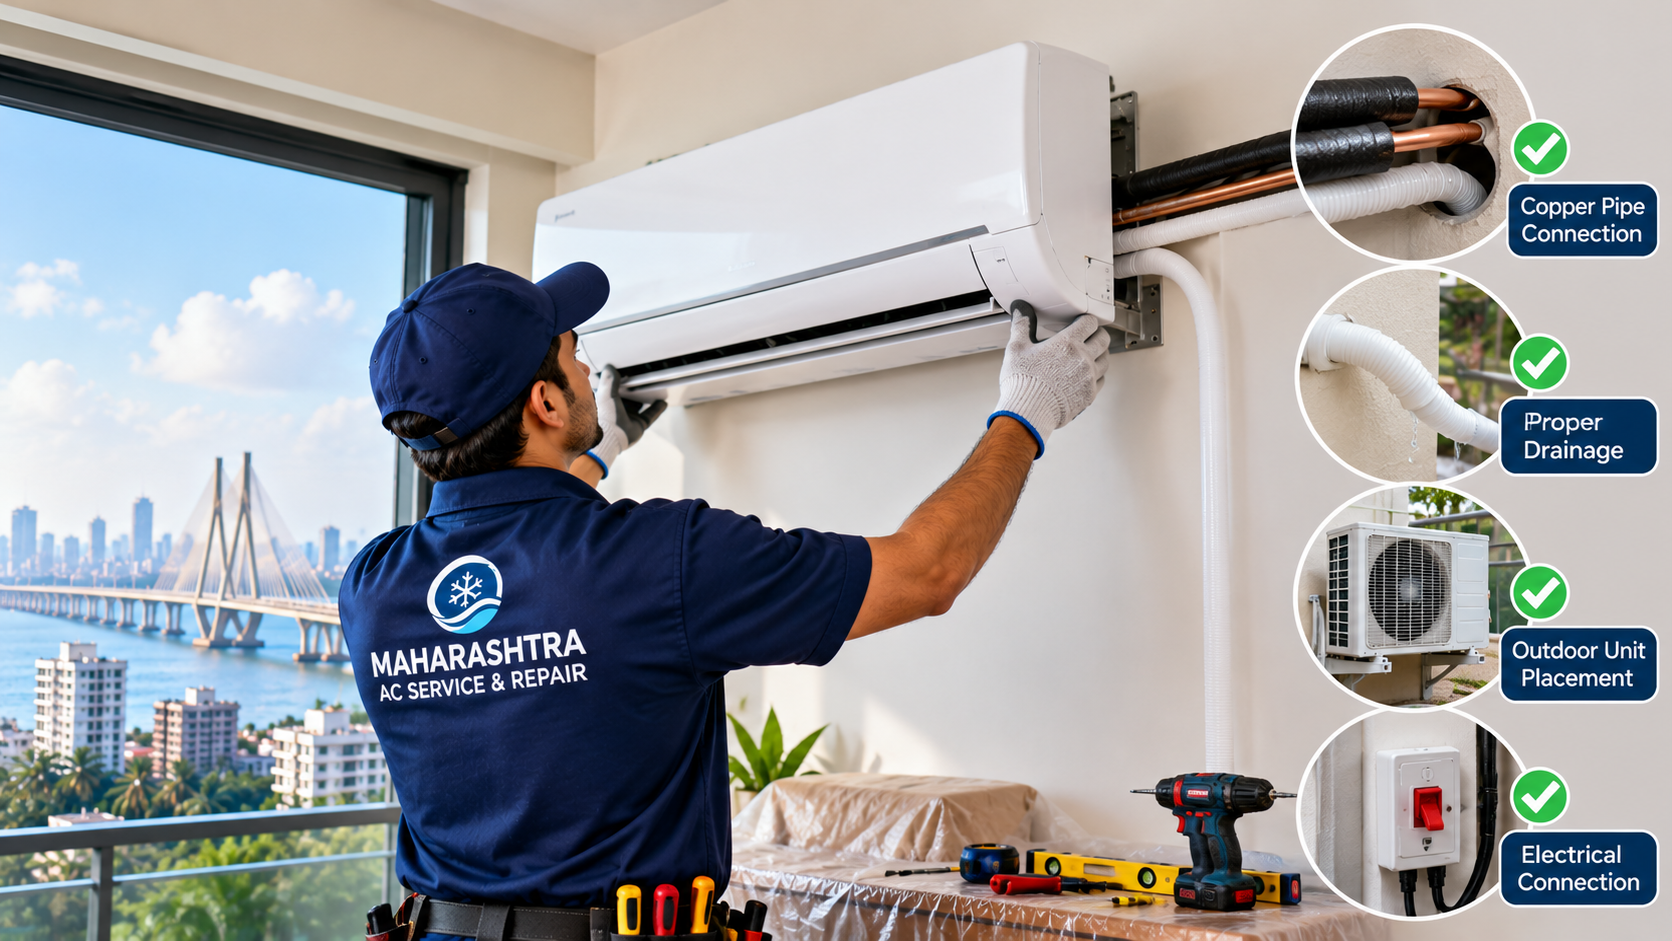
Buying a split AC is one thing. Getting it installed properly is what makes the real difference.
You might choose an AC with the right capacity, good energy ratings and all the features you need, but a poor installation can still cause problems. The unit may take longer to cool the room, water may start dripping indoors, or the AC may need repairs sooner than expected.
These issues are not always caused by the AC itself. Sometimes, the problem starts with the location of the indoor unit, poor drainage, incorrect copper pipe connections or an outdoor unit placed in a space with insufficient airflow.
Before your technician begins the split AC installation, it is worth checking a few important details. This guide explains what to prepare, where the units should be placed, which installation steps matter and what you should test before accepting the completed work.
Quick Answer: What Should You Check Before Split AC Installation?
Check the indoor and outdoor unit locations, airflow clearances, copper pipe route, drainage slope, electrical supply, quoted installation costs and the manufacturer’s installation requirements. Ask the technician to follow the correct commissioning procedure and test the AC before leaving. Electrical work, refrigerant connections and mounting heavy units should be handled by qualified professionals.
1. Choose the Right Location for the Indoor Unit
The position of the indoor unit affects how air moves around your room. If it is installed in an unsuitable location, some areas may remain warm even when the AC is running.
Before drilling holes in the wall, consider the following points.
- Airflow: Choose a position where cool air can spread across the room without being blocked by tall cupboards, curtains or other furniture.
- Installation clearance: Leave the clearances recommended by the AC manufacturer around the unit. The installer needs enough space for proper airflow and future servicing.
- Wall strength: The wall should safely support the indoor unit and its mounting plate.
- Access for maintenance: The filters and front panel should be easy to reach for routine cleaning.
- Distance from heat sources: Avoid locations where direct sunlight or heat from appliances could affect the unit’s temperature readings.
Also, think about where you usually sit, sleep or work. You may not want the airflow blowing directly onto your bed or desk for long periods.
Do not select a location based only on appearance. A neat installation is useful, but proper airflow and easy maintenance matter more.
2. Check the Outdoor Unit Location
The outdoor unit releases heat collected from inside your room. It needs sufficient space for air circulation and should be mounted securely.
A cramped balcony corner may look convenient, but it can restrict airflow if the unit is surrounded by walls or stored items. Restricted airflow can reduce cooling performance and place additional strain on the system.
Before installation, check these points:
- Ventilation: The unit should have the clearances specified by the manufacturer.
- Stable support: The mounting brackets or platform must be strong enough to carry the unit’s weight.
- Vibration: Proper mounting helps reduce vibration and unwanted noise.
- Weather exposure: The location should be suitable for outdoor use and allow rainwater to drain as intended.
- Service access: A technician should be able to reach the unit safely for cleaning, inspection and repairs.
- Neighbour considerations: Avoid positioning it where operating noise or discharged hot air will create an unnecessary disturbance.
If you live in an apartment, check building rules before mounting the outdoor unit on an exterior wall or common area. Some residential societies require approval or specify where outdoor units may be placed.
One important point: Do not compromise safety to save installation space. Work at height and heavy outdoor-unit mounting should be handled by trained professionals using suitable equipment.
3. Confirm the Copper Pipe Route
Copper pipes connect the indoor and outdoor units and carry refrigerant through the system. Their length, routing and connections must follow the AC manufacturer’s installation requirements.
Before the work begins, ask the technician where the pipes will run and where they will pass through the wall.
A good pipe route should:
- Follow the manufacturer’s limits for pipe length and height difference.
- Avoid unnecessary bends and damage.
- Be properly insulated to help prevent condensation and unwanted heat gain.
- Protect exposed sections from physical damage and weather where necessary.
- Allow the wall opening to be sealed properly after the pipes are installed.
Longer pipe runs may require additional refrigerant or other adjustments, depending on the model and the manufacturer’s instructions. Do not assume every AC can be installed with any pipe length.
Ask the technician to explain whether the planned route falls within the model’s permitted limits. This is especially useful when the indoor unit is in a bedroom and the outdoor unit must be placed on a balcony or another side of the building.
Why pipe connections matter
Poorly made connections can lead to refrigerant leakage. A leak may reduce cooling performance and eventually require a technician to locate and repair the problem.
The installer should use the correct tools and follow the manufacturer’s specified connection and testing procedure. Simply tightening a connection by guesswork is not a substitute for proper installation.
4. Make Sure the Drainage Pipe Is Planned Properly
One installation detail that homeowners often overlook is the drain pipe.
When an AC cools the room, moisture from the indoor air collects on the evaporator coil. This moisture needs to flow out through the drainage system. If the pipe is installed incorrectly, water may leak from the indoor unit or collect around the wall.
Before installation, ask the technician to check:
- Drainage slope: The pipe should have the appropriate downward slope wherever gravity drainage is used.
- Pipe routing: The route should not have unwanted dips or bends that allow water to collect.
- Drain outlet: Water should discharge at a suitable location without damaging the wall or creating a nuisance.
- Leak testing: The technician should test the drainage system before finishing the job.
This check is particularly useful during the rainy season or in humid weather, when indoor AC systems can remove a considerable amount of moisture from the air.
If the drain pipe needs to pass through a wall, confirm its position before drilling. Changing the route after the installation is complete can mean additional work and expense.
5. Check the Electrical Connection Before Installation
A split AC needs a suitable electrical supply. Do not assume that an existing socket or extension board is automatically safe for the new unit.
The electrical requirements depend on the AC model, its rated current and the manufacturer’s instructions. Your technician or a qualified electrician should check whether the existing wiring and protective devices are appropriate.
Here is what to discuss before the installation:
- Dedicated electrical circuit: Depending on the AC’s requirements and local electrical standards, a dedicated circuit may be necessary.
- Correct wire size: The wiring must be suitable for the electrical load and the installation conditions.
- Circuit protection: The appropriate circuit breaker and other protective devices should be installed as required.
- Earthing: Proper earthing is essential for electrical safety.
- Connection quality: Loose or unsuitable connections can create overheating and operating problems.
Avoid using an extension cord or an undersized power strip to operate a split AC unless the manufacturer explicitly permits the arrangement. If the existing wiring is old or damaged, have it inspected before connecting the appliance.
It is also worth checking whether your home has enough electrical capacity for the new AC alongside other appliances.
6. Confirm the Installation Cost Before Work Begins
The price quoted for a split AC installation may not include every item required at your home. The final cost can depend on the model, pipe length, installation location and additional electrical or structural work.
Before giving the technician approval, ask what the quoted amount covers.
For example, confirm whether the price includes:
- Mounting the indoor and outdoor units.
- Standard copper piping and insulation.
- Drain pipe installation.
- Wall drilling and sealing.
- Electrical connection work.
- Outdoor-unit brackets, if required.
- Additional piping or other extra materials.
- Testing and commissioning.
Not every installation package includes all these items. Some manufacturers or sellers provide standard installation with specific limits, while extra work may be charged separately.
Ask for the charges before the technician carries out additional work. This helps you understand the final bill and reduces the chance of disagreements after the installation.
If the AC is still under warranty, check the manufacturer’s installation conditions as well. Unauthorised installation or work that does not follow the manufacturer’s requirements may affect warranty coverage.
7. Ask About Vacuuming the Refrigerant Lines
Vacuuming is an important step in the installation of many new split AC systems.
After the refrigerant pipes are connected, air and moisture may remain inside the circuit. These should be removed using the procedure specified by the manufacturer. A suitable vacuum pump and appropriate tools are commonly used for this purpose.
Why does it matter? Moisture or non-condensable gases left inside the refrigerant circuit can interfere with system operation and may contribute to performance or reliability problems.
Before installation, ask the technician how the refrigerant lines will be prepared and whether the model requires evacuation with a vacuum pump. The work should follow the manufacturer’s specified procedure.
Avoid accepting shortcuts based on the claim that a new AC does not need proper commissioning. The correct process depends on the equipment and installation instructions, not simply on whether the appliance is new.
Also, do not attempt to release refrigerant or open refrigerant connections yourself. These tasks require appropriate training and equipment.
8. Test the AC Before the Technician Leaves
Once the physical installation is complete, do not simply switch on the AC for a few seconds and assume everything is fine.
Ask the technician to carry out the manufacturer’s recommended commissioning checks. You can also observe how the system operates.
Here are a few things to check together:
- Cooling operation: Confirm that the AC starts cooling and that the airflow feels appropriate for the operating conditions.
- Indoor-unit noise: Listen for unusual rattling, vibration or other unexpected sounds.
- Outdoor-unit operation: Check that the outdoor unit operates as expected for the selected mode and conditions.
- Water drainage: Confirm that the drainage arrangement works and that water is not leaking from the indoor unit.
- Remote control: Test the basic functions, including temperature adjustment and operating modes.
- Display and error codes: Check whether any warning or error code appears.
- Installation finish: Inspect the wall opening, pipe insulation and visible connections for unfinished work.
Remember that an AC may not produce an immediate dramatic temperature change in every situation. Room size, outdoor temperature, humidity, the selected setting and the time allowed for operation all influence the result.
If something seems unusual, explain it to the technician before the visit ends. Ask them to investigate rather than accepting a problem that could have been identified during commissioning.
Keep the installation invoice, warranty documents and service details in a safe place.
9. Common Split AC Installation Mistakes to Avoid
Many installation problems begin with small decisions made before the unit is switched on.
| Common mistake | Why it matters |
|---|---|
| Placing the indoor unit where airflow is blocked | Cooling may be uneven across the room. |
| Installing the outdoor unit in a poorly ventilated space | Restricted airflow can affect performance. |
| Using an unsuitable drainage route | Water may collect or leak indoors. |
| Ignoring electrical requirements | The installation may be unsafe or unreliable. |
| Making poor refrigerant pipe connections | Leaks and cooling problems may develop. |
| Skipping required commissioning steps | Installation issues may go unnoticed. |
| Failing to confirm additional charges | The final installation bill may be higher than expected. |
The solution is not to supervise every technical task yourself. Instead, discuss the installation plan in advance and choose a technician who can explain the work clearly.
10. When Should You Book Professional Split AC Installation?
Professional installation is important for both new AC purchases and replacement units. The job may involve drilling, electrical work, mounting heavy equipment, handling refrigerant lines and testing the finished system.
If you are replacing an old AC, tell the technician beforehand. The existing pipes, wiring and mounting brackets may need inspection before they can be reused. Their suitability depends on the new model and the manufacturer’s requirements.
Similarly, if your home has limited balcony space, difficult outdoor access or a long distance between the indoor and outdoor units, mention these details when arranging the service.
A proper assessment helps the technician plan the job, identify extra requirements and explain the likely installation cost before work starts.
For homeowners looking for split AC installation in Pune or Mumbai, explore our AC services and service areas pages for coverage information.
The aim is simple: install the AC correctly from the beginning instead of paying for avoidable corrections later.
Conclusion
A successful split AC installation involves more than fixing two units to the wall. The location of the indoor unit, ventilation around the outdoor unit, refrigerant pipe connections, drainage, electrical safety and final testing all deserve attention.
Before your installation appointment, decide where you want the units placed, check any building restrictions and ask the technician what the quoted price includes. During the work, make sure the installation follows the manufacturer’s requirements. Before the technician leaves, test the AC and ask questions about anything that seems unusual.
Taking a little time to check these details can help you avoid common installation problems and make it easier to maintain your AC in the future.
Frequently Asked Questions
1. How long does split AC installation take?
The time depends on the installation location, pipe route, electrical preparation and whether additional work is required. A straightforward installation may take a few hours, while complicated installations can take longer. Ask the technician for an estimate after assessing the site.
2. Can I install a split AC myself?
It is better to use a trained professional. Installation can involve electrical connections, heavy equipment, refrigerant piping, drilling and commissioning. Incorrect work can create safety risks and affect the AC’s performance.
3. Is vacuuming necessary during split AC installation?
For many split AC installations, evacuating the refrigerant lines with a vacuum pump is an important part of the specified procedure. Follow the manufacturer’s installation instructions and ask the technician how the system will be prepared before commissioning.
4. Where should the outdoor unit of a split AC be installed?
The outdoor unit should be installed on a stable support in a location with sufficient airflow and safe service access. The clearances specified by the manufacturer must be maintained. Apartment residents should also check building rules before choosing an exterior mounting location.
5. What should I check after split AC installation?
Check cooling operation, unusual noise, drainage, remote-control functions and any displayed error codes. Ask the technician to complete the recommended commissioning checks and explain how to operate the AC correctly.